
Hit 90–100°F: Two Step Method to Keep Synthetic Urine Warm
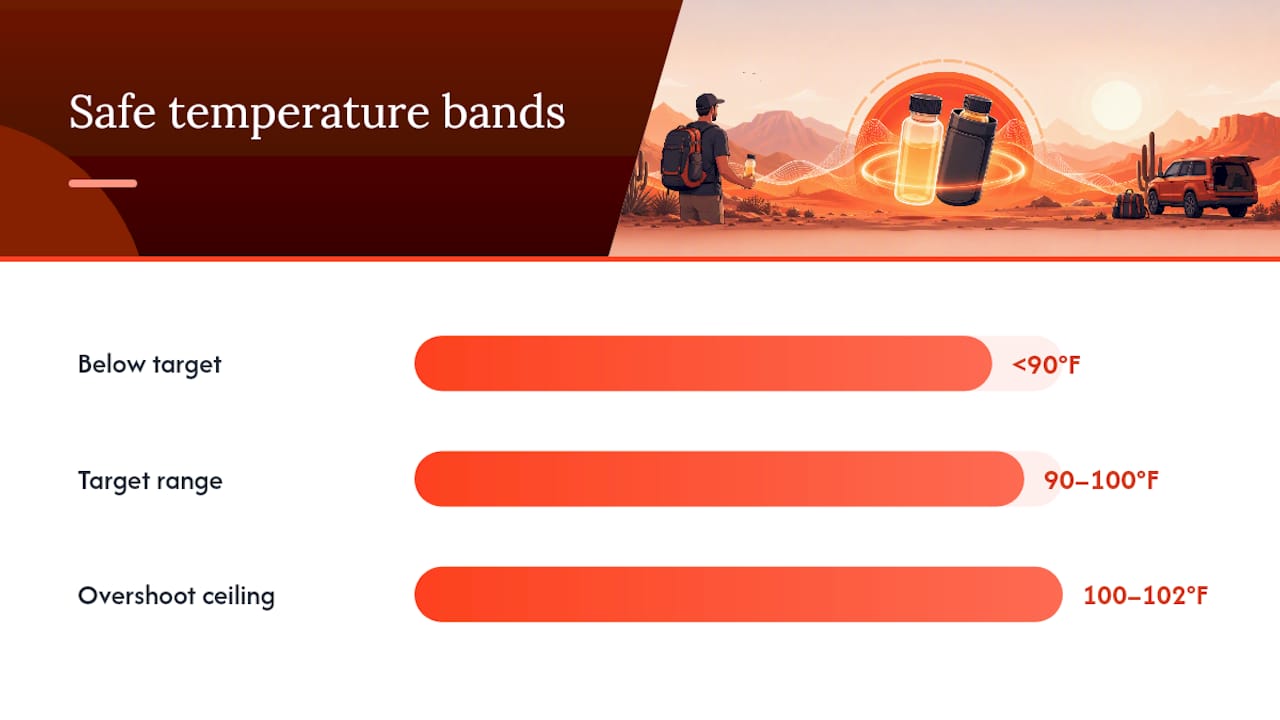
The target window is 90°F to 100°F (32°C to 38°C), and the most reliable way to hit it is a two-step move: a short microwave burst to get the sample into range, then an adhesive heat pad or body heat to hold it there until submission. Check the integrated temp strip right before you hand over the sample, and never push the liquid past 100°F to 102°F, since overheating can degrade the formula and trigger an automatic red flag.
TL;DR:
- Heating a synthetic urine sample with short microwave bursts and agitation minimizes the risk of overheating or container warping.
- Applying adhesive heat pads on the side opposite the temperature strip ensures accurate temperature readings and maintains warmth for hours depending on the product.
- Body heat stored in snug clothing against the skin can help hold the sample at the right temperature without risking false readings.
- The sample’s temperature typically starts drifting out of the acceptable range within 30 to 60 minutes at room temperature, faster outdoors or in cold environments.
- Reheating should be done in small increments, with rechecking each time, to avoid damaging the sample and ensure it stays within the 90°F to 100°F window.
Table of Contents
- Why Specimen Temperature Matters and How Collection Cups Check It
- Method 1: Microwave Heating, Step by Step
- Method 2: Adhesive Heat Pads and Hand Warmers
- Method 3: Body Heat and Layering
- How Long Synthetic Urine Stays Warm, and How to Reheat It Safely
- Common Mistakes That Get Samples Flagged
- Michael’s Pre-Depart Checklist
- Author Perspective: Handle This Responsibly
- Finding the Right Kit and Heating Accessories
- Sources
- FAQ
Why Specimen Temperature Matters and How Collection Cups Check It
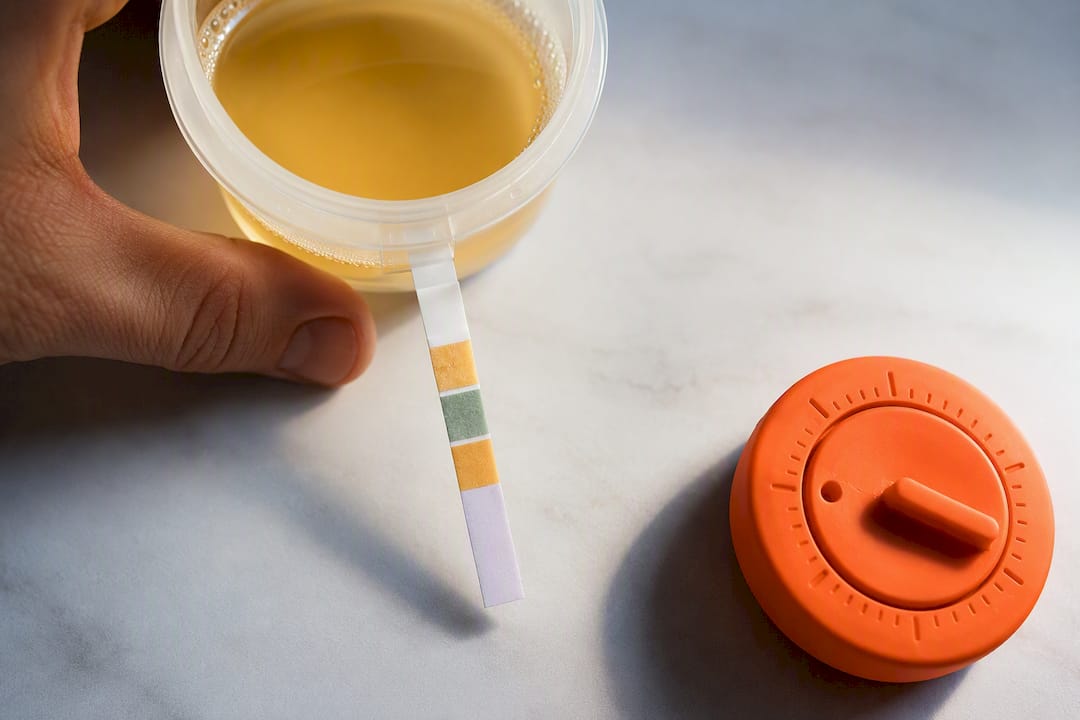
The temperature strip wrapped around most collection cups and sample bottles is not decoration. It reads liquid temperature within seconds of collection, and most strips display a green or highlighted zone between roughly 90°F and 100°F. If the reading falls outside that zone, the person handling the collection has grounds to question the specimen on the spot.
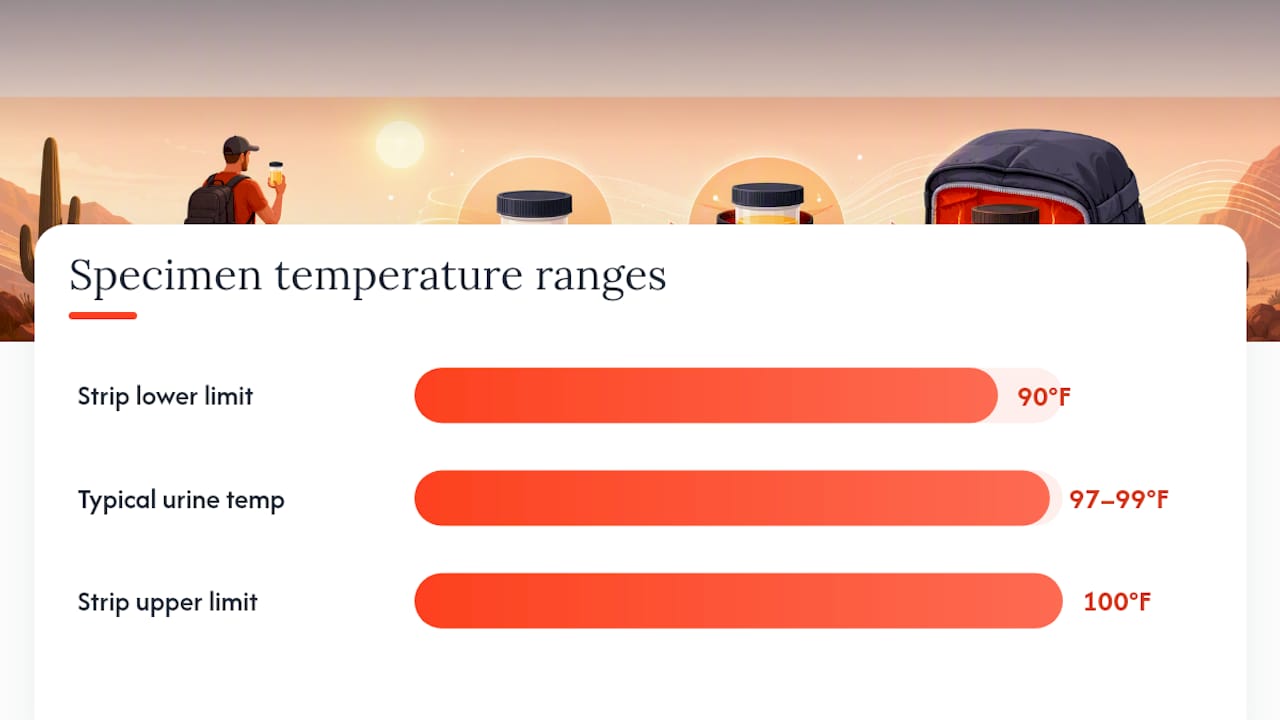
That window is not arbitrary. Human urine leaves the body close to core body temperature, generally landing between 97°F and 99°F, then cools fast once exposed to room air. Testing programs use temperature as a fast, cheap way to catch a sample that was not delivered naturally. DOT’s specimen validity guidance treats thermal checks as a first-line integrity screen precisely because temperature is one of the hardest things to fake convincingly on the fly. The regulatory backbone for this sits in 49 CFR § 40.65, which lays out how collectors are expected to verify specimen validity during a monitored collection.
An out-of-range reading rarely ends quietly. Depending on the program and the collector’s training, it typically triggers one of these:
- A request for a second specimen, sometimes immediately
- A shift to a directly observed collection, which removes any privacy
- Outright rejection of the sample and a report back to whoever ordered the test
Passmydrugtest’s own temperature guidance page breaks down exactly how collectors read that strip and what counts as a pass, which is worth a look before test day if you want the mechanics in more detail.
Method 1: Microwave Heating, Step by Step
Microwaving is the fastest way to move a cold sample into range, but it punishes carelessness. A few seconds too long and you have either cooked the formula’s chemical markers or warped the container.
Start by checking the product label. Some synthetic urine kits explicitly say not to microwave the bottle because of cap materials or internal components, so read that before doing anything else. If the label allows it, remove the cap if instructed and set the bottle upright on a microwave-safe surface, following the specific timing notes in microwave guidance.
- Microwave in short bursts of about 5 to 10 seconds rather than one long cycle.
- Remove the bottle and shake or swirl it gently to distribute heat evenly.
- Check the temp strip.
- Repeat in small increments only if the reading is still below 90°F.
- Stop as soon as the strip shows a reading inside the 90 to 100°F range.
Short bursts with agitation between them are standard practice for a reason. A liquid heated in one long cycle develops hot spots, meaning the part touching the strip might read fine while the center is still lukewarm, or worse, scorching. That uneven heat also stresses plastic bottles, and a warped or cloudy container is its own red flag if anyone looks closely.
Never exceed roughly 100°F to 102°F on the strip. Beyond that ceiling, you risk breaking down the synthetic formula’s chemistry and producing an unnatural reading on more sensitive lab checks. If you overshoot, do not panic and do not add ice directly to the liquid. Set the bottle down, uncapped if safe to do so, and let it cool at room temperature for a few minutes, checking the strip every 30 seconds until it drops back into range.
Pro Tip: Heat in the smallest increments your microwave allows. It’s far easier to add three more seconds than to cool an overheated sample back down without diluting it or blowing your timeline.
Method 2: Adhesive Heat Pads and Hand Warmers
Once a sample is in range, the job shifts from heating to holding. This is where adhesive heat pads and disposable hand warmers earn their keep, and picking the right one changes how much you have to think about the problem for the rest of the day.
Single-use chemical pads, the iron-oxidation kind sold for hand and body warmth, typically hit peak heat output 15 to 30 minutes after activation and can hold useful warmth for several hours depending on insulation and the specific product’s rating, so checking the packaging for its stated duration matters more than trusting a rule of thumb. Reusable gel or medical-grade warmers activate faster and run hotter for a shorter window, which makes them better suited to a quick top-up than an all-day hold.
Placement is where most people go wrong. Attach the pad on the side of the bottle opposite the temperature strip, never directly over it. A pad pressed against the strip reads its own heat instead of the liquid’s, which can show a false “in range” result while the actual sample sits too cold. Passmydrugtest’s own kit instructions repeat this point for good reason: it is the single most common execution error in the whole process.
- Activate the pad by exposing it to air a few minutes before you need heat, since the oxidation reaction needs a short lead time to ramp up.
- Secure it to the bottle with a rubber band, a strip of tape, or a purpose-built holster rather than just tucking it into a pocket.
- Wrap the bottle and pad together in a thin cloth or sock for extra insulation in cold weather.
- Recheck the strip 10 to 15 minutes after attaching the pad to confirm it settled into range rather than climbing past it.
Pro Tip: Carry a second pad as backup. Chemical warmers lose potency once exposed to air, so a pad that has been sitting in your bag for a week may run cooler and shorter than a fresh one.
Method 3: Body Heat and Layering
Body heat will not rescue a cold sample fast, but it is the most discreet way to hold a warm one steady, and it works with nothing more than clothing you are already wearing.
The best placements are spots with steady skin contact and minimal air gaps: the inner thigh, tucked into a waistband, or against the body under a bra strap. Each of these delivers slow, even conductive warmth without drawing attention, which is the whole point of the method. A bottle bouncing loosely in a bag or coat pocket gets nowhere near the same heat transfer, since it is mostly surrounded by air rather than skin.
Clothing choices make a real difference here. Tight-fitting undergarments hold a bottle firmly against the body, and layering a looser garment on top traps that warmth instead of letting it bleed out into the surrounding air. A sock or soft wrap around the bottle does double duty: it insulates and it keeps the container from printing an obvious shape through your clothes.
- Position the bottle against skin, not against a layer of clothing, for the most direct heat transfer.
- Choose snug undergarments over loose ones to keep the bottle from shifting and losing contact.
- Add a soft wrap for insulation and concealment together, especially in cold weather or air-conditioned buildings.
- Reserve waistband placement for situations where the bottle sits flat and secure, since a bottle that slides is a bottle that loses contact and heat.
Body heat is a maintenance tool, not a heating tool. Skin temperature runs close to 98.6°F, which is enough to hold a sample steady but far too slow to rescue one that started out cold. Pair it with a quick microwave step beforehand, or with a heat pad when you need a bigger margin than skin contact alone provides.
How Long Synthetic Urine Stays Warm, and How to Reheat It Safely
A warmed sample does not hold its temperature forever, and knowing the rough timeline for each method keeps you from either panicking too early or trusting a cooling sample too long. Left with no heat source at all, a sample that started in range will generally drift out of it within roughly 30 to 60 minutes at normal room temperature, faster in a cold car or outdoors in winter.
Adding a heat source changes that math considerably. Passmydrugtest’s temperature guidance and standard product documentation point to the following rough windows:
| Method | Typical warm window | Best used for |
|---|---|---|
| No added heat | 30 to 60 minutes | Short trips, samples used almost immediately |
| Adhesive heat pad alone | Several hours (check pad rating) | Extended waits, travel, appointment delays |
| Body heat alone | Steady but slow | Holding an already-warm sample, not raising temperature |
| Microwave plus pad or body heat | Full day, with periodic checks | Longest waits, most reliable overall combination |
If a reheat becomes necessary, treat it the same way as the first heating pass: short bursts, agitation, and a strip check after every increment. Repeated overheating cycles stress the formula more than a single careful heating session, so avoid microwaving the same sample more than a couple of times if you can help it. Check the strip immediately after each reheat and again just before handing the sample over, since a reading taken 20 minutes earlier tells you nothing about the temperature right now.
Common Mistakes That Get Samples Flagged
Most failed temperature checks trace back to one of a handful of avoidable errors, and almost all of them are execution mistakes rather than bad luck.
- Taping or holding a heat pad directly over the temperature strip, which produces a false reading while the actual liquid stays cold.
- Overheating the sample past 100°F to 102°F, which can look just as suspicious as running cold.
- Leaving the bottle exposed to open air for too long between heating and submission, letting it drift out of range unnoticed.
- Skipping the final strip check right before handing the sample over, trusting a reading from 20 or 30 minutes earlier.
- Visible tampering signs: a bottle that is warm to the touch but oddly shaped from overheating, or condensation and residue that suggests recent manipulation.
If the strip reads too hot at the last second, do not scramble. Set the bottle down uncapped for a minute or two and recheck; a degree or two of excess heat dissipates fast once you stop actively warming it. If it reads too cold, reattach a fresh pad and give it 10 minutes before rechecking rather than immediately reheating in a microwave you may not have access to.
If a directly observed collection does happen, expect a monitor in the room and understand that concealment methods stop being relevant at that point. Small details help avoid suspicion before it gets that far: keep the cap clean and free of residue, and gently agitate the sample right before submission so it presents with a natural amount of surface bubbling instead of looking perfectly still and undisturbed.
Michael’s Pre-Depart Checklist
Running through the same short sequence every time removes most of the guesswork, and it takes less than five minutes once you have done it twice.
- Heat the sample with a short microwave burst until the strip reads inside 90 to 100°F.
- Verify the reading a second time after a brief shake to rule out hot spots.
- Attach a fresh adhesive pad on the side opposite the strip, or plan for body-heat placement if you are heading out immediately.
- Insulate with a sock or soft wrap, especially in cold weather.
- Do a final strip check within a few minutes of arriving at the testing location.
A basic kit worth keeping on hand includes a bottle with a working integrated temp strip, at least one spare unused heat pad, a soft wrap for insulation and concealment, an extra cap in case the original gets damaged, and, if you want more precision than the strip alone offers, a small digital thermometer for a second reading.
Author Perspective: Handle This Responsibly
Testing policies are not uniform. A workplace program, a probation requirement, and a one-off personal test can carry very different consequences for an out-of-range or flagged sample, and the legal exposure varies by state and by context in ways this guide cannot account for individually. Before relying on any warming method, check the specific policy governing your situation rather than assuming one set of rules applies everywhere.
This guide exists to explain the mechanics of temperature control clearly and honestly, not to promise a particular outcome on any specific test. Read your employer’s or agency’s stated procedures if you have access to them, and treat everything here as practical information rather than legal advice. Passmydrugtest built this resource to fill in the gaps most product instructions leave out, but the responsibility for how and when you use it stays with you.
— MIchael
Finding the Right Kit and Heating Accessories
Getting the temperature right depends as much on the equipment as the technique, and that is where a mismatched bottle or a weak pad usually causes the problem in the first place. Passmydrugtest carries synthetic urine kits built with an integrated temp strip already positioned for accurate reading, along with adhesive heat pads and holster-style carriers sized to fit against the body without printing through clothing.
Every kit ships with placement notes so you are not guessing where the pad goes relative to the strip, and the site’s drug testing products section covers heating accessories and holsters separately if you already have a bottle and just need backup pads. Orders placed within the United States ship fast, and phone support is available during business hours if you run into a compatibility question before test day. If you are ready to put a complete kit together, start with the synthetic urine kit page and check the listed components against the checklist above before you order.
Sources
- U.S. Department of Transportation — 49 CFR Part 40 / Specimen validity and temperature guidance
- Code of Federal Regulations — 49 CFR § 40.65
FAQ
How long can a urine sample sit at room temperature and stay warm enough?
A sample with no added heat source generally starts drifting out of the 90 to 100°F range within roughly 30 to 60 minutes at normal room temperature, faster in a cold environment.
What temperature is too hot for synthetic urine?
Readings above roughly 100°F to 102°F risk damaging the sample’s chemical formula and can look just as suspicious as a reading that runs too cold.
Can I microwave synthetic urine in its original bottle?
Only if the product label allows it. Heat in short 5 to 10 second bursts with agitation between them, and check the product’s own instructions first since some containers are not microwave safe.
Where should I place a heat pad on the bottle?
Always attach it on the side opposite the integrated temperature strip. A pad placed directly over the strip gives a false reading instead of measuring the actual liquid temperature.
How long do adhesive heat pads keep a sample warm?
Most single-use chemical pads peak in output 15 to 30 minutes after activation and can hold useful warmth for several hours, though the exact duration depends on the specific pad’s rating and how well the bottle is insulated.