
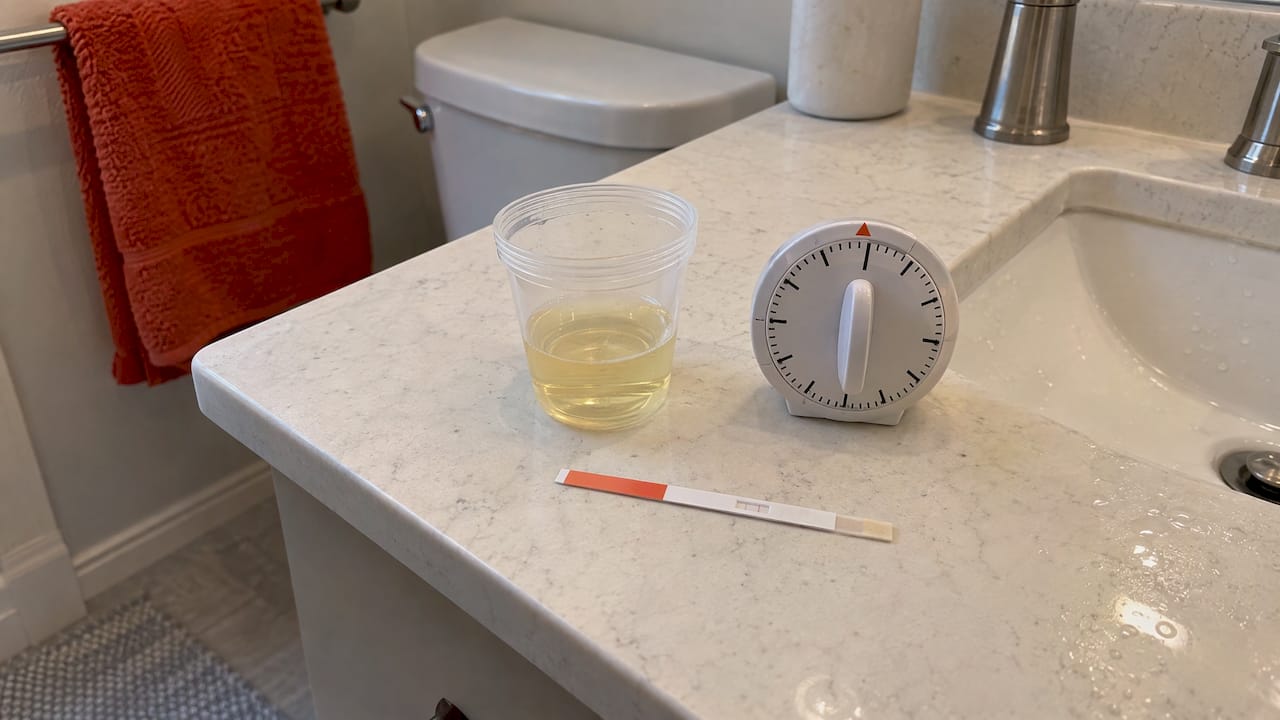
THC Test Strip Instructions: How to Dip, Time and Read Your Result
A THC urine test strip takes about five minutes and four actions: collect a fresh sample, dip the strip to the marked line for the time on your insert, lay it flat, and read it inside the stated window. Two lines, a control line © and a test line (T), mean negative. A control line alone means positive. No control line means the test is invalid and you start over with a new strip. Where kits differ, your package insert wins, so keep it open while you test.
This guide walks through each step, shows where people most often go wrong, and explains what the result does and does not tell you before a workplace, legal or pre-employment screening.
TL;DR
- Use fresh urine in a clean, dry cup, dip only to the max line for the time on your insert (commonly about 10 to 15 seconds), then lay the strip flat.
- Read at the time your insert gives, commonly around 5 minutes. Ignore anything that develops after the window closes.
- Two lines (C and T) is negative, one line at C is positive, and no C line is invalid. Any faint test line still counts as a line.
- Most consumer strips screen at 50 ng/mL. A negative means “below that cutoff on this sample,” not zero THC.
- A home strip is a preliminary screen. A formal test that follows a positive screen uses a separate lab confirmation.
Table of Contents
- What a THC strip actually measures
- Before you start: set up the test
- Step-by-step THC test strip instructions
- How to read the lines
- What a negative or positive actually means
- Things that change your result
- What a home strip cannot tell you
- A repeatable testing routine before a screening
- Where our kits and support fit
- Our perspective
- FAQ
- Sources
What a THC strip actually measures
A THC strip does not look for THC itself. It looks for THC-COOH, the main metabolite (a substance your body makes as it breaks THC down) that lingers in urine long after the effects of cannabis have passed. The University of Iowa Health Care laboratory handbook lists a 50 ng/mL cutoff for this metabolite on the initial urine screen, and lists quantitative confirmation as a separate step.
The cutoff is the concentration at which the strip is designed to flip from “negative” to “positive.” Below it, the strip reads negative. At or above it, the strip reads positive. FDA records for over-the-counter home tests show the same logic: one consumer multi-drug test is documented with a 50 ng/mL marijuana cutoff and a preliminary result only, and an older home THC screen was cleared as a rapid qualitative immunoassay with the same 50 ng/mL cutoff. “Qualitative” means it answers yes or no at the cutoff. It does not give you a number.
If you want the full picture of how 50 ng/mL and the lower 15 ng/mL lab figure fit together, our guide to THC cutoff levels explains both.
Before you start: set up the test
Most failed home tests fail before the strip ever touches urine. Spend two minutes on setup.
- Check the expiration date on the pouch. An expired strip can give a result you cannot trust.
- Bring the kit to room temperature. If it has been in a hot car or a cold garage, let it sit before opening it.
- Read the insert. Read times, dip times and the “max” line position vary between brands. Your insert is the rule for your strip.
- Set out a timer, a clean dry collection cup and a flat, non-absorbent surface such as a clean countertop or the cup’s lid.
- Wash and dry your hands. Open the foil pouch only when you are ready to dip. Do not touch the reactive end of the strip, the end that goes into the urine.
If you are testing to see where you stand before an employer screening, test the way the real test will be done: a fresh urine sample, collected the same way, ideally at a similar time of day. First-morning urine tends to be the most concentrated sample of the day, which makes it a tougher and more realistic check than a heavily diluted midday sample.
Step-by-step THC test strip instructions
Step 1: Collect a fresh sample
Use a clean, dry cup. A rinsed cup that is still wet can dilute the sample. Many kit instructions describe a midstream collection: begin urinating into the toilet, catch the middle of the stream in the cup, and finish in the toilet. Collect enough urine to reach the strip’s max line when you dip.
Where it goes wrong: using a sample that has sat for hours, collecting after drinking a large amount of fluids, or using a cup with soap or cleaning residue. Test within the time your insert allows after collection, and test fresh urine.
Step 2: Dip the strip to the marked line, not past it
Take the strip out of the pouch and hold it by the end opposite the arrows. Dip the strip vertically into the urine with the arrow end down, and keep the urine level at or below the max line printed on the strip. Hold it for the time your insert states. For many strips that is about 10 to 15 seconds.
Where it goes wrong: submerging the strip above the max line pushes urine over the result window and can distort the lines. Leaving it in too long, or too short a time, changes how the liquid travels up the strip.
Step 3: Lay it flat and start the timer
Take the strip out, lay it flat on a non-absorbent surface, and start your timer immediately. Do not hold it upright, tilt it, or touch the result window. Set it aside from heat and direct sun.
Where it goes wrong: checking too early and reading a half-developed strip, or walking away and reading it much later.
Step 4: Read inside the window
Most strips are read at about 5 minutes. Read within the window your insert gives. Many inserts tell you to disregard results that appear well after the read time, because urine keeps evaporating on the strip and can leave faint marks that mean nothing. If you came back to a strip twenty minutes later, test again with a new one instead of trying to interpret it.
Step 5: Record and dispose
Note the time, the result and the lot number on the pouch. If you plan to test again in a few days to track your progress, writing this down makes comparisons honest. Dispose of the strip and cup with household trash after washing your hands.
How to read the lines
Every strip has a control line marked C and a test line marked T. The control line tells you the strip worked. The test line tells you about THC.
| What you see | Result | What to do |
|---|---|---|
| Lines at both C and T | Negative at the strip’s cutoff | Note it. This is a screen, not a guarantee of zero THC. |
| Line at C only, no line at T | Positive at the strip’s cutoff | Treat as a presumptive positive. A formal test would confirm it separately. |
| No line at C, with or without a T line | Invalid | Discard it and test again with a new strip and a fresh sample. |
Why a faint test line is confusing
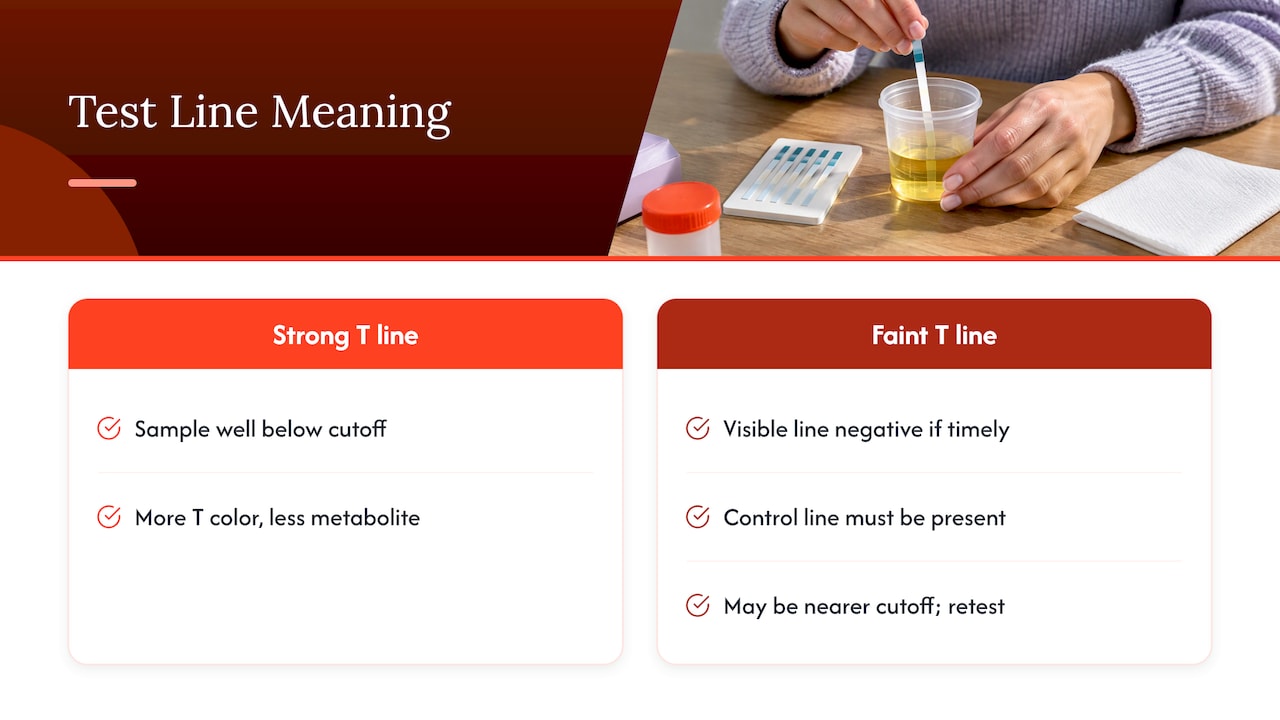
These strips work backwards from what most people expect. The test line appears when there is not enough THC metabolite to block it. More metabolite in the urine means less color at T. That is why a strong T line means the sample sits well below the cutoff, and a fading T line means the concentration is getting closer to it.
So what about a faint line? Most kit inserts treat any visible test line, however light, as negative, as long as you read it within the specified time and the control line is present. Check how your insert words this, and compare the strip to the picture on the instructions in good light. A faint line is a sign you may be nearer the cutoff than you think, and it deserves a retest rather than relief.
What makes a strip invalid
An invalid strip usually has no control line. Typical causes are too little urine, a strip that was dipped past the max line, an expired or damaged strip, or storage in the wrong temperature. The fix is simple: repeat with a new strip and fresh urine. Never reuse the strip and do not try to “rescue” it by adding more urine.
What a negative or positive actually means
This is the part that gets people into trouble. A home strip answers one narrow question: was the metabolite above or below the cutoff in this sample, at this moment?
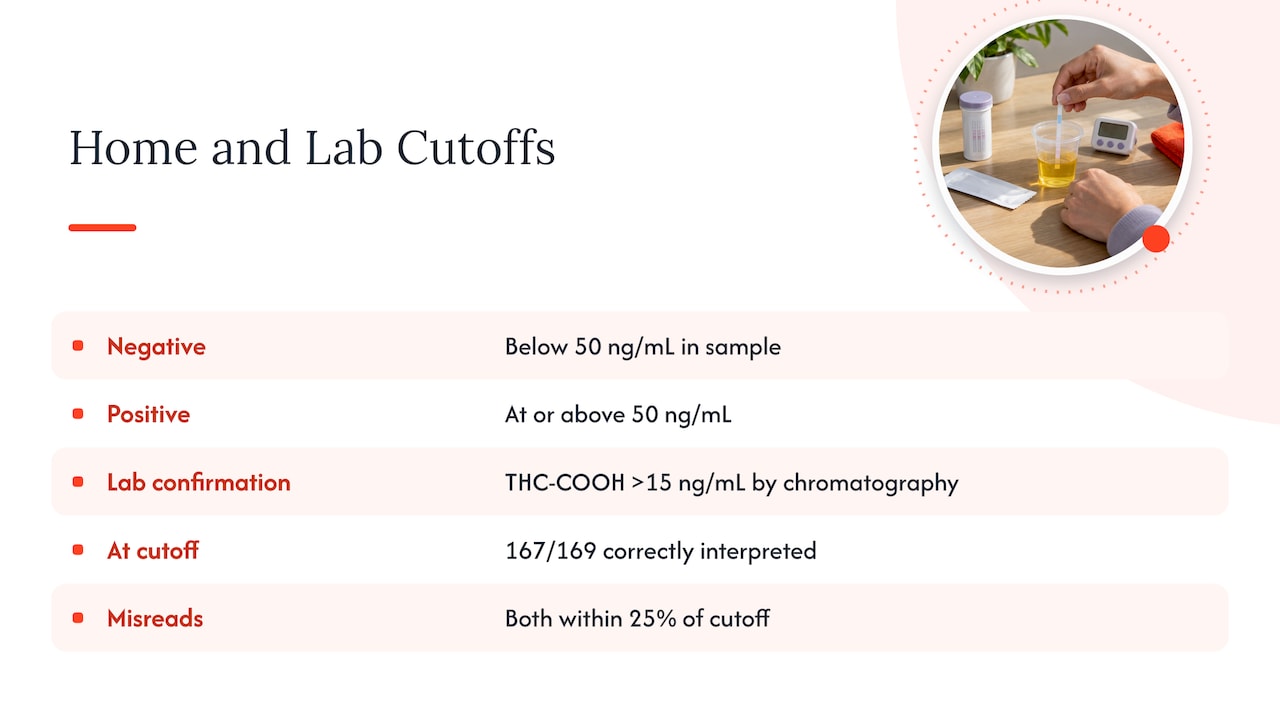
A negative means “below 50 ng/mL on this sample.” It is not proof that you are THC-free. THC-COOH can sit below the screening cutoff and still be present. The FDA record for the home multi-drug test cited above frames its result as preliminary and requiring laboratory confirmation, and the same record shows a bit of reality about accuracy: samples near the cutoff are where the strip is most likely to misread. In that study, THC at the cutoff was correctly interpreted in 167 of 169 samples, and both misreads were within 25% of the cutoff value.
A positive means the metabolite was at or above the cutoff. It does not tell you how much THC you used, when, or how. The ACMT position statement on urine interpretation says urine THC metabolite tests do not identify route, source, specific timing or dose of exposure, or impairment. A positive only means THC was in the body before the sample was collected.
The lab figure is different. The same ACMT statement notes that a laboratory defines a positive cannabis urine result as THC-COOH greater than 15 ng/mL by chromatography, run as a separate confirmation. A home strip at 50 ng/mL says nothing about that lower number. For a plain-language breakdown, see our page on what 50 and 15 ng/mL mean on a drug test.
How long THC-COOH stays detectable
The same ACMT statement notes that in chronic heavy users THC-COOH may be detectable for a month or longer after last use, and that interpretation depends on how much and how long someone used, time since last use, hydration and other individual factors. Occasional use clears faster; daily use clears slower. If you want a realistic estimate for your pattern, our THC detection times guide and our THC detox timeline lay out urine windows by frequency of use. The ranges are wide, which is why testing yourself on a strip is useful: it replaces a guess with a data point.
Things that change your result
Hydration. Dehydration concentrates urine. Heavy fluid intake dilutes it. Columbia University’s Go Ask Alice explains that drinking large amounts of water can lower the metabolite level, but it only produces a negative if the metabolite is already nearly gone, and that labs can usually spot dilution because other urine components drop too. A strip you run after drinking a liter of water is not a fair preview of a supervised collection.
Time of day. Your first urine of the morning is typically the most concentrated. A mid-afternoon sample after several drinks can read lighter.
Frequency of use. One session and daily use leave very different footprints, and the strip only sees the footprint, not the history. Our look at whether a weekend’s use trips a 50 ng/mL urine test shows how pattern changes the picture.
Product type. Hemp-derived and THCA products can leave the same metabolite behind. See our write-up on THCA and workplace drug tests if you use flower or vapes labeled as legal.
Storage and handling. Heat, humidity, a damaged pouch, wet hands and touching the reactive end all create noise. Handle the strip like a lab sample, because to the strip, that is what it is.
What a home strip cannot tell you
A strip tells you about one urine sample. It cannot tell you:
- Whether you are drug-free. A negative can still carry some metabolite below the cutoff.
- When you last used or how much. A positive result tells you only that exposure occurred, a point the Emergency Medicine News piece quoting NIDA researcher Marilyn Huestis makes as well: it says nothing about route, amount, timing or impairment.
- How a different test will go. Hair and saliva tests have different windows and different cutoffs from urine. A clean urine strip says nothing about a hair follicle test.
- How a particular employer’s lab will read it. If you get a positive on a formal screen, confirmation testing is a separate, laboratory-based step.
If a strip is positive and you have a test scheduled, take the positive as useful information while you still have time to act on it, rather than as a verdict. And if a positive result ever relates to a medication you take, a medical review officer or your doctor is the person to speak with, because some medications and foods can affect immunoassay screens.
A repeatable testing routine before a screening
Testing once is a snapshot. Testing on a schedule gives you a trend. Here is a simple routine for the days before an urine test.
- Use the same brand of strip each time so the cutoff and read time stay constant.
- Test first-morning urine at about the same time of day.
- Record the date, time, strip lot and what you see, including how strong the T line is.
- Compare results over several days. A T line that gets darker over time suggests the metabolite is falling. A line that stays pale means you should keep going before relying on any single read.
- Test again close to your appointment, using a fresh sample.
The trend matters more than any one result, because a single read can be affected by hydration and timing.
Where our kits and support fit
If you want one place to compare at-home options by test type and get your questions answered before you order, our urine drug testing section is built for exactly that. We ship fast within the United States, and our team is available by phone during published business hours if you want help matching a product to the kind of test you are facing, whether that is urine, saliva or hair.
You can browse everything we carry from our main store page, and use our educational guides to understand what your screening is likely to look for before you choose.
Our perspective
We built this site around one idea: people facing a drug test make better decisions when they understand the test first. A strip is a good example. It is a small, simple device, and used correctly it gives you honest information about where you stand.
The mistakes we would most like to prevent are not dramatic. They are an expired strip, a wet cup, a dip that went past the line, or a read twenty minutes late. Each one turns a useful data point into a coin flip. That is why we put the process, the cutoffs and the detection windows in front of you before you buy anything.
We also think the right product depends on the right test. Urine, saliva and hair each work differently, so we organize our store by test type and keep a team on the phone during published hours to help you match your situation to the right product. Know your test, know your numbers, and give yourself time to act on what you learn.
MIchael
FAQ
How long do I dip a THC test strip in urine?
Most strips are dipped for about 10 to 15 seconds, with the urine at or below the max line printed on the strip. Your package insert sets the exact time for your brand, so follow it over any general guide. Then lay the strip flat and start your timer.
Is a faint line on a THC test strip positive or negative?
On most strips, a faint test line next to a clear control line is read as negative, because the line forms only when metabolite stays below the cutoff. A fading line suggests your level is getting closer to the cutoff, so retest with fresh urine. Always compare to the picture and wording on your own insert.
How long should I wait to read the result?
Most strips are read at around 5 minutes. Read inside the window on your insert and disregard anything that appears after it, since drying urine can leave marks that mean nothing. If you missed the window, run a new strip.
Does a negative strip mean I will pass a drug test?
Not necessarily. A negative means the sample was below the strip’s cutoff, commonly 50 ng/mL, while a laboratory confirmation uses a separate, lower 15 ng/mL cutoff. Hair and saliva tests are different tests altogether. Use the strip as a screen and look at your trend over several days.
What do I do if the strip is invalid?
An invalid strip has no control line. Discard it and repeat the test with a new strip and a fresh urine sample. Check the expiration date, the dip depth and the storage conditions, since those are the usual causes.
Sources
- University of Iowa Health Care: THC laboratory handbook entry
- FDA 510(k) record: On Call Multi-Drug Home Test (K050050)
- FDA 510(k) record: At Home Cocaine & THC Screening Test (K991641)
- ACMT position statement: Interpretation of urine for cannabis
- Columbia University Go Ask Alice: Marijuana and drug detox kits
- Emergency Medicine News: Toxicology Rounds, five myths about marijuana tests